Parallel Weather Modeling in the Cloud
Weather and climate modeling is becoming more critical as more and more industries rely on accurate forecasting from typical weather to severe storms. This modeling can provide insights and cause/effect relationships we have yet to discover. It can also extend our current understanding of the changing climate.
In this experiment, the computation tool is the Weather Research and Forecasting (WRF) model. WRF is a next-generation mesoscale numerical weather prediction system designed for both atmospheric research and operational forecasting applications. The Mesoscale and Microscale Meteorology Laboratory (MMM) of NCAR supports the WRF system to the user community, maintains the WRF code, and oversees the release process. Running the em_quarterly datasets to provide a proof of concept in a cloud-based parallel environment.
One researcher posted a plea for help in the UCAR forums trying to figure out how to cost-effectively and time-efficiently get his research work done. Based on his fixed on campus computational environment. He calculated that his 30 year simulation run would take ~900H (37.5d) for a single run. He asked if this was normal, and several other users confirmed that his estimates were pretty accurate. This is a common HPC challenge, because not only are on-prem computing environments limited in resources, and often backed-up with jobs queued.
Getting On The Clouds
Google is constantly pushing for lower latency, newest hardware and improved usability for research and low latency workloads. One of those enhancements is the development of Placement Policies, which give you control over where your instances are physically located relative to each other within a zone.
The platform for this POC is Google Cloud (GCP) using CloudyCluster; which enables Parallel Computation aka HPC allowing researchers, investigators, engineers, and others to take months of computation and complete them in hours or days by parallelizing and batching their workloads. CloudyCluster comes complete, ready to compute with dozens of popular Open Source HPC software solutions including WRF. It can also be extended with your own software by creating a custom CloudyCluster image.
For this experiment, the first step is to prep the dataset provided by was prepared and used to test and run the simulation model calculations to output the visualizations below. This is a 3D Idealized test case,
The next step is to plan how CloudyCluster would be used. There are a number of powerful configurations that can be leveraged to deliver the computational power required. The beauty is CloudyCluster’s ability to scale compute groups based on your inputs within the job script. This means that it is not necessary to configure the largest VM Google has to offer. On the contrary, you can often successfully use a small Control Node to launch CloudyCluster and then scale the jobs in a very economical way to control costs and get the work done.
Preparation For WRF CloudyCluster has, as mentioned, dozens of software packages, libraries and tools pre-installed and ready to go. In the root of the /software directory, a few sample jobs have been created to allow testing of some of the packages, including WRF. Two scripts are present that require a simple edit to designate the Scheduler (Torque/SLURM) that is going to be used, then run. In the included samples below, Slurm was the scheduler used.
#!/bin/sh #CC -gcpit n1-highcpu-16 #CC -ni 1 #Uncomment this section for use with Torque/Maui HPC Scheduler ##PBS -l nodes=1 #Uncomment this section for use with Slurm HPC Scheduler #SBATCH -N 1
This compiling script also defines the parallel file system working directory and runs the idealized steps for the data preparation.
#Need to change the location of the shared FS to the name you specified in the CloudyCluster creation wizard when launching the cluster export SHARED_FS_NAME=/mnt/orangefs
Part of the compiling script moves the application and the data to the parallel file system location to take full advantage of the design.
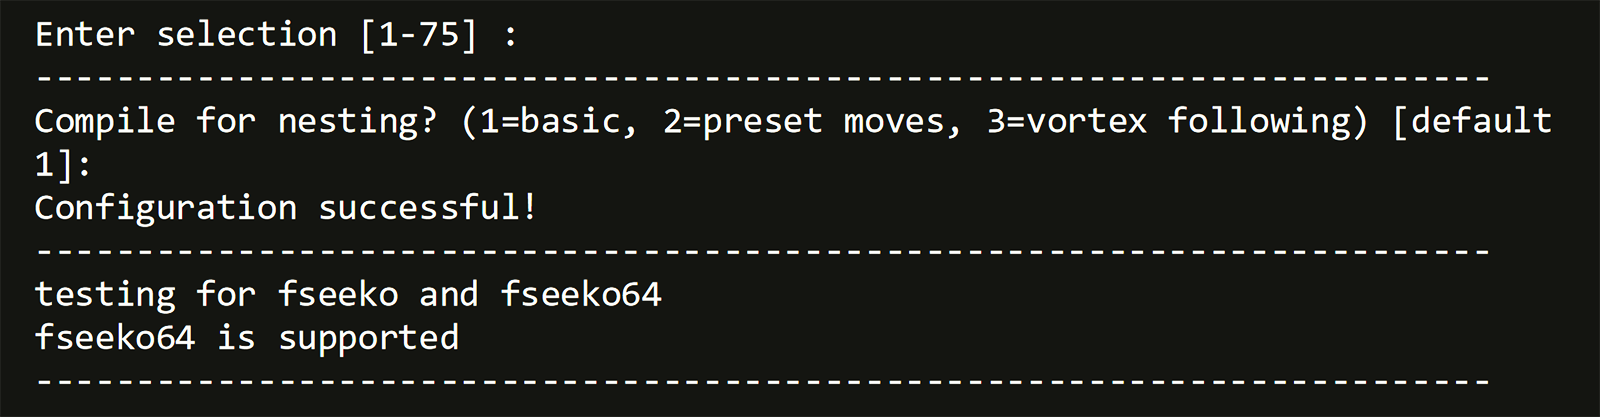
cp -Rp /software/wrf $SHARED_FS_NAME cd $SHARED_FS_NAME/wrf/WRF printf '34\n1\n' | NETCDF=/usr ./configure ./compile em_quarter_ss cd run ./ideal.exe
Similarly, after running the Compile script, the job script also needs to be configured for the run, in terms of defining the scheduler and the compute node requirements.
#!/bin/sh #CC -gcpit n1-highcpu-2 #CC -ni 2 #Uncomment this section for use with Torque/Maui HPC Scheduler ##PBS -l nodes=2:ppn=2 #Uncomment this section for use with Slurm HPC Scheduler #SBATCH -N 2 #SBATCH --ntasks-per-node=2 #Need to change the location of the shared FS to the name you specified in the CloudyCluster creation wizard when launching the cluster export SHARED_FS_NAME=/mnt/orangefs cd $SHARED_FS_NAME/wrf/WRF/run mpirun -np 4 wrf.exe namelist.input
The job is submitted using CCQ, CloudyCluster’s intelligent meta-scheduler (ccqsub em_quarter_ssCompile.sh) to queue the jobs and work with the designated scheduler, which was selected during the cluster environment creation and referenced in the job script. The job will then run, and you can monitor the status in real-time using the ccqstat, a utility that gives you the status of all the jobs that have been submitted to ccq.
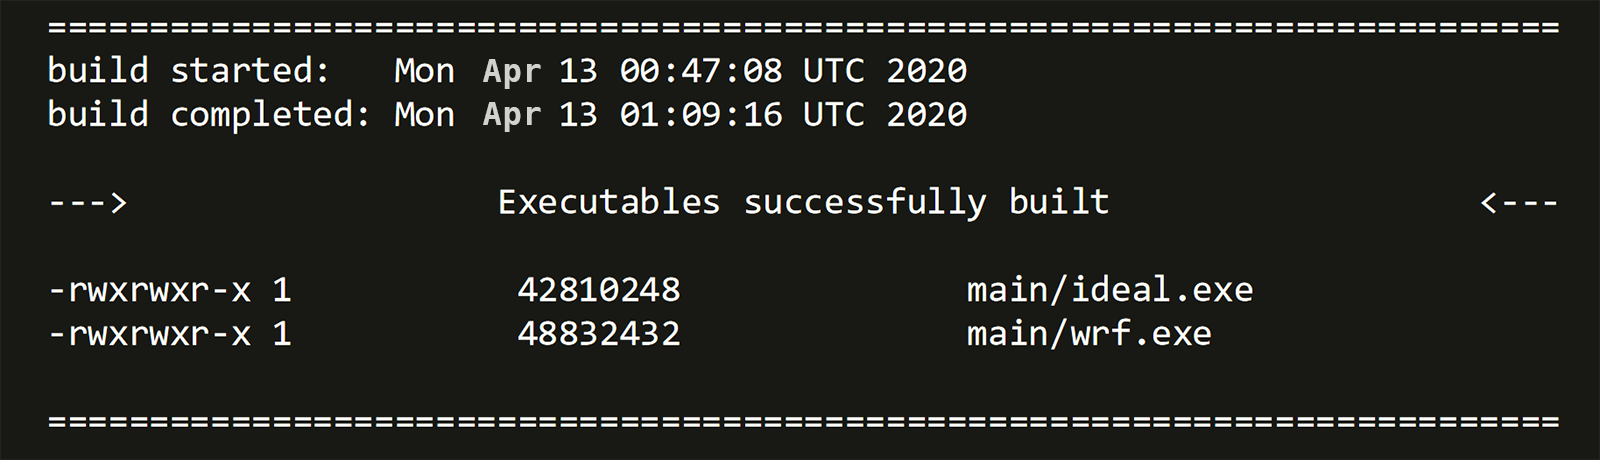
After the run is complete, the output files are dumped for the next steps. The -o flag when using ccqsub can be used to designate -o <stdout_file_location> the path to the file where you want the Standard Output from your job to be written to. The default location is the submitting user’s home directory for job status outputs and the working directory for the WRF dump files.
CCQ will give you a “Completed” status in ccqstat letting you know that the job has completed.


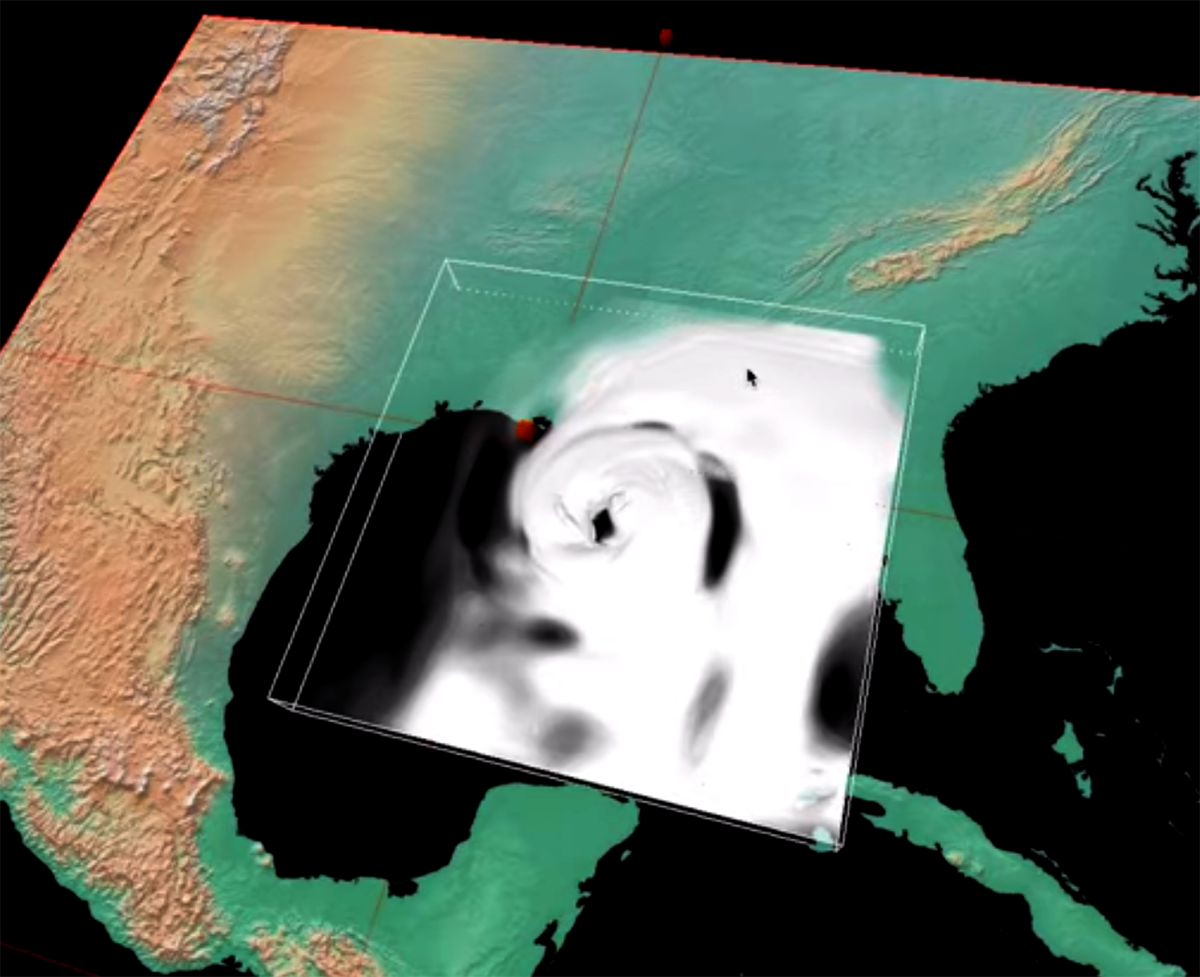
<Visualization Here
This is a smple visualization produced in Vapor.
WRF Supporting Details NCAR/UCAR WRF User Manual, in Chapter 5, outlines how you can run Real or Idealized models, depending on the desired outcomes and the input requirements follow that path.
- UCAR Data Archive https://rda.ucar.edu/
- NCAR User Forums: https://ncarrda.blogspot.com/
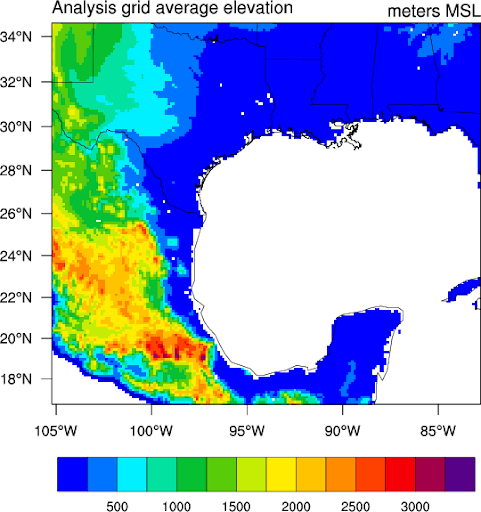
- Image Source: https://www.ncl.ucar.edu/Applications/wrfstat.shtml
- Vapor: http://www.vapor.ucar.edu/
