Data sets for investigation and research can be critical and need to be kept around for at least the life of a research project, but possibly much longer based on data retention policies. Google Cloud Storages (GCS) is object storage that is resilient and easy to use and scale. GCS has such features as:
- *>*9.99% availability for standard, and *>*99.95% for other storage classes
- Multiple storage classes (Standard, Nearline, Coldline, and Archive) which can be managed automatically based on access frequency or time.
- The easy ability to create a public site, or a private site shared with a few colleagues.
- Aggressive pricing, in an example scenario where 11% of data is in Standard, 11% in Nearline, 22% in Coldline and the remaining 56% in Archive, the 5 year cost can be as low as $300 per TB.
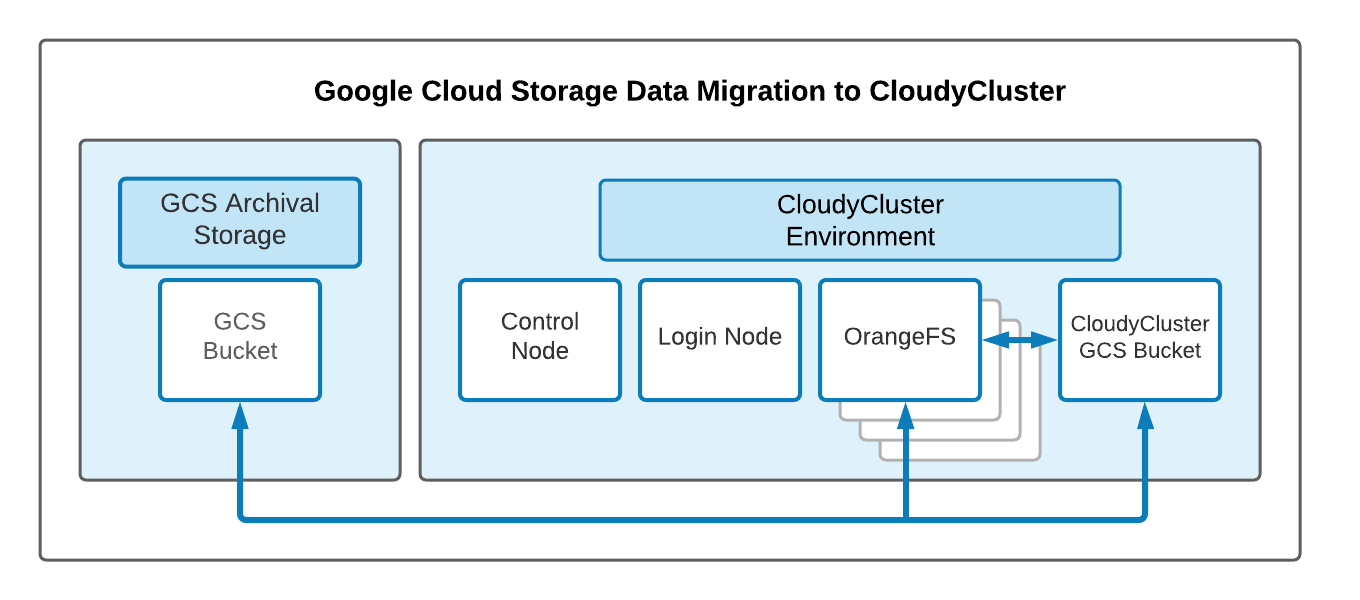
By default CloudyCluster creates a GCS bucket automatically for easy use with CloudyCluster, if you want your data to potentially live longer than your HPC environment, you may want to consider creating additional bucket(s) and storage hierarchies as required.
In this document we will outline how to create a GCS bucket and give the required internal and external access required.
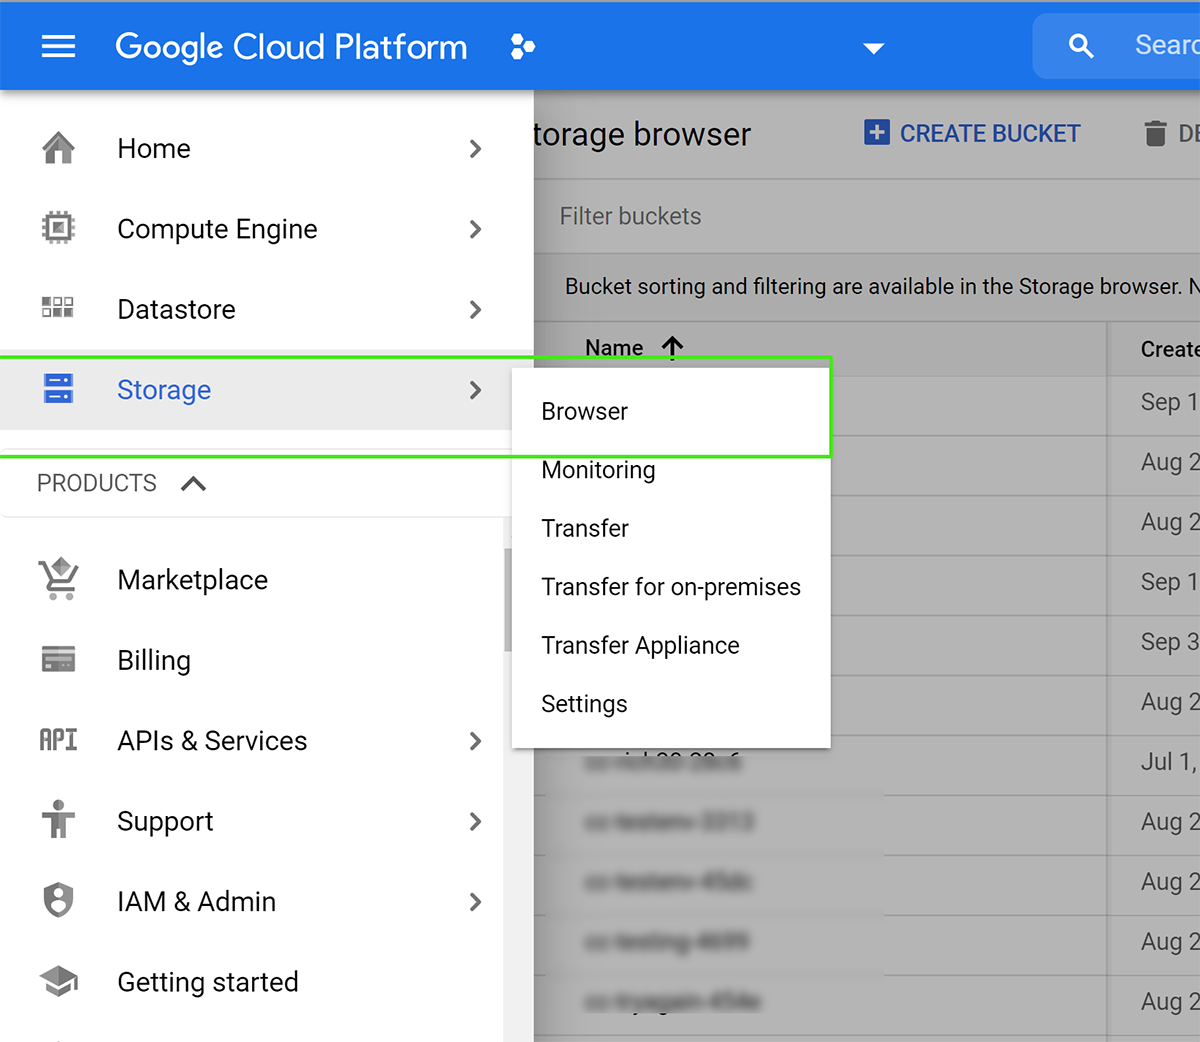
Create and Setup Your GCS Bucket
Using Google GCS Storage, create a storage bucket as a stand-alone storage space. While you are situating your data you can pause your CloudyCluster environment to optimize costs.

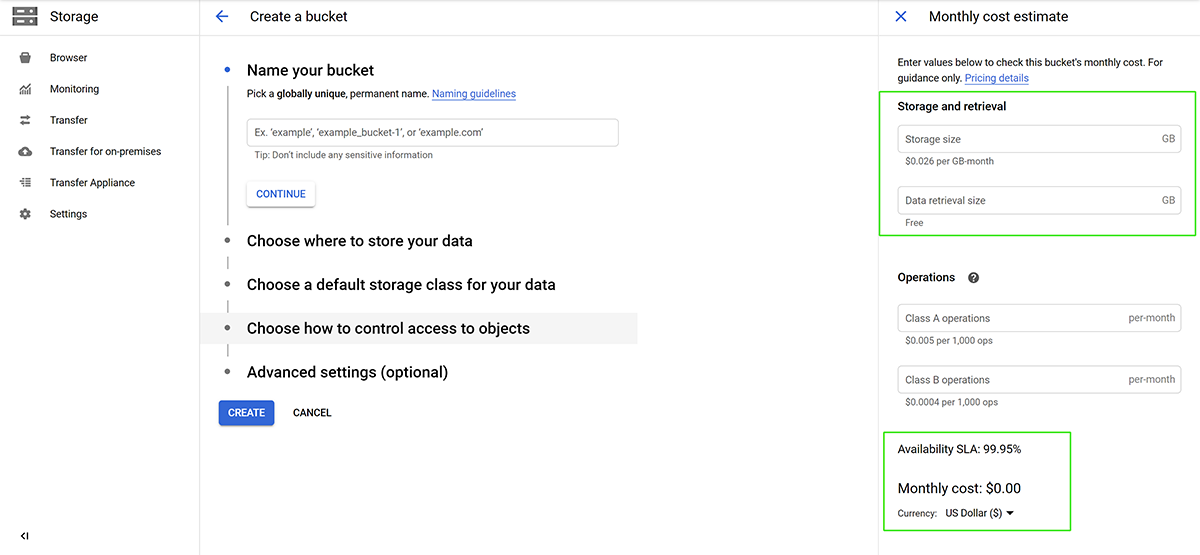
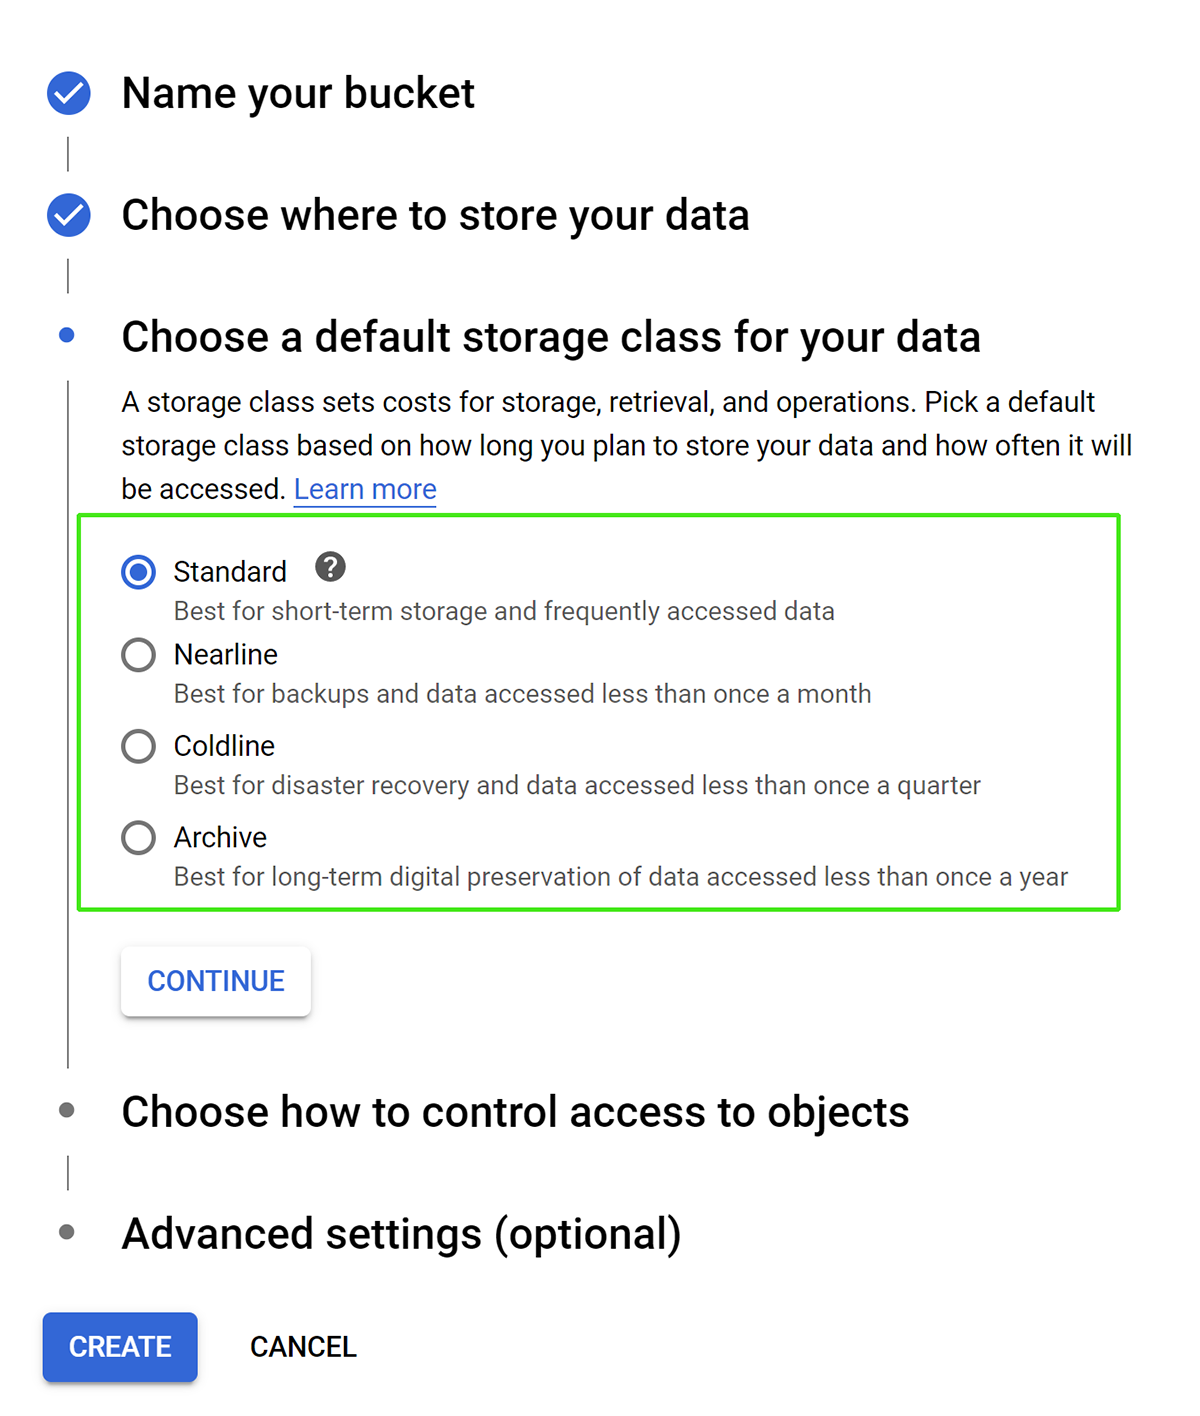
Determine the type of storage and which frequency of accessibility you will need with at least one bucket being standard and other storage classes can be used as needed. To help determine the cost you can use the storage calculator on the right side.
Depending on who you need to grant access to and how you want to utilize this newly created bucket you set the permissions here.
-
Public Bucket, this is where you want to let anyone use the data, you can also set it up so the account that downloads the data pays the network charges. This is done by granting allUsers access to the bucket.
-
Staging Bucket, use the new bucket as a staging bucket to easily transfer the data needed for processing to and from the bucket created automatically with CloudyCluster. For this method you don’t need any special permissions.
-
Compute Direct Bucket, use the bucket directly from the compute nodes when you launch a job. CloudyCluster uses several SAs to limit access to the least permissions needed.
-
-<rnd 4>-cp-sa (compute nodes) Compute Viewer, Cloud Datastore User, Service Account User, Logs Writer, Storage Admin -
-<rnd 4>-fs-sa (filesystem nodes) Compute Instance Admin (v1), Compute Storage Admin, Cloud Datastore User, Service Account User, Logs Writer -
-<rnd 4>-ln-sa (login node) Compute Network Admin, Compute Security Admin, Cloud Datastore User, Service Account User, Logs Writer -
-<rnd 4>-sc-sa (scheduler node) Compute Instance Admin (v1), Compute Network Admin, Cloud Datastore User, Service Account User, Logs Writer -
SA naming is as follows:
-<random 4 digit collision prevention string>- @ .iam.gserviceaccount.com To enable any of the node types above to access the bucket, you will need to grant the appropriate permissions you require.
-
As an example below you will see how to set up public access to the bucket, you can use the same process for the 3rd method above by switching out allUsers with the SA required.
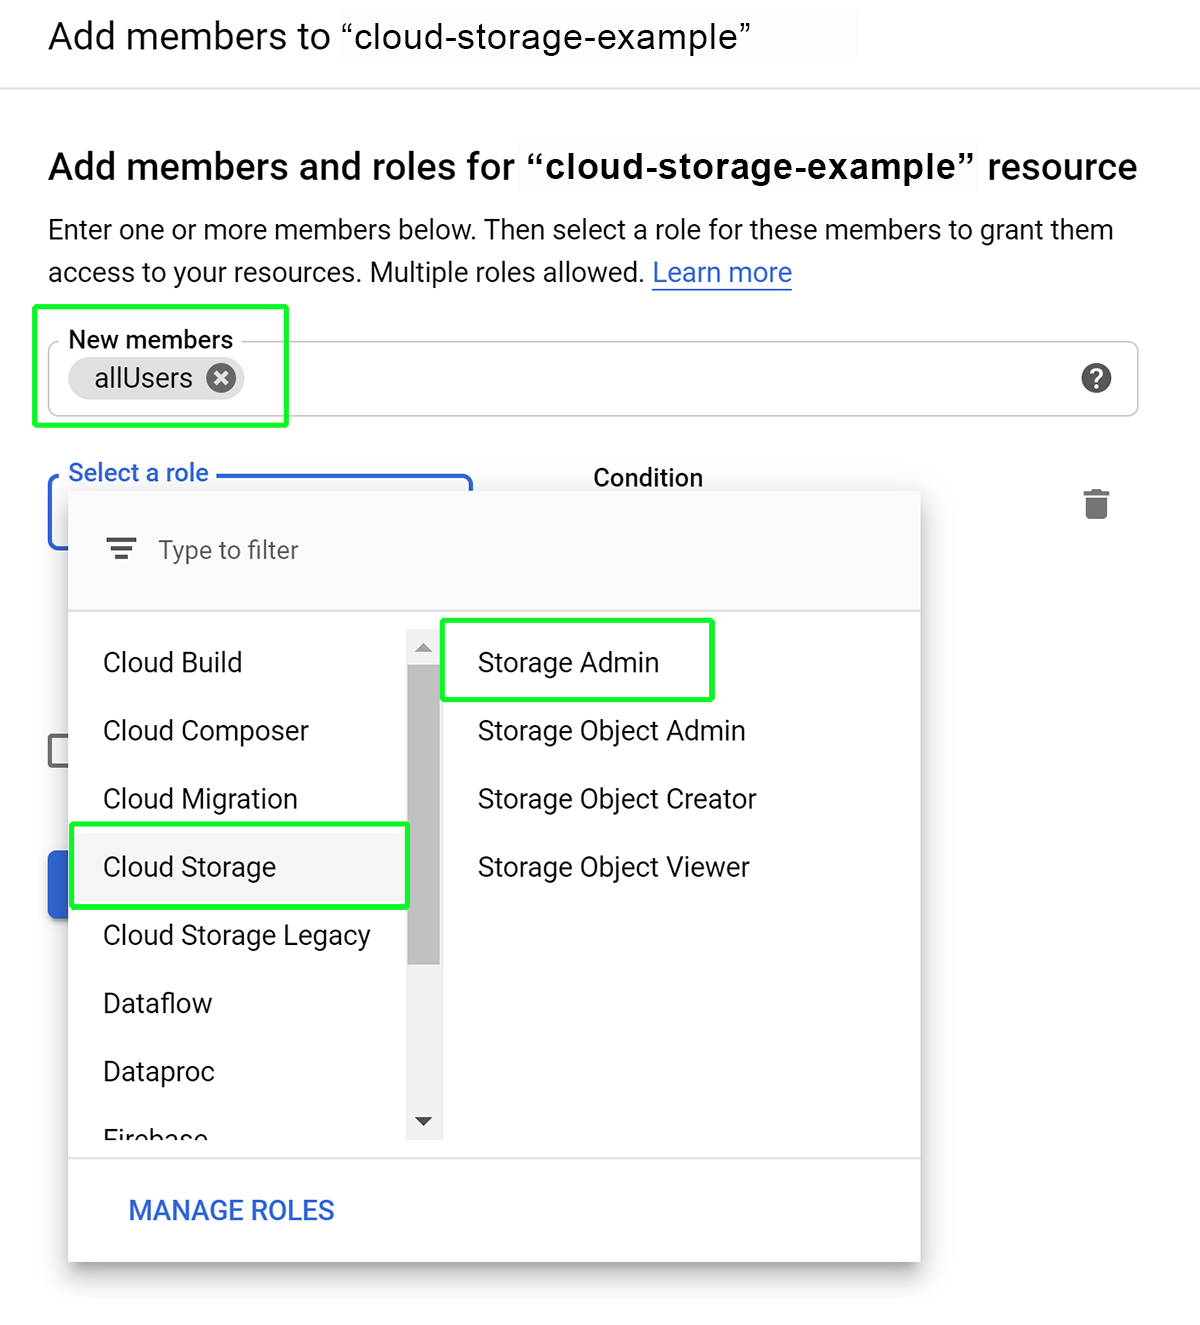
Note: Again this example gives public access to your storage bucket, make sure to use allUsers for public, but if you don’t want public access, then use one of the other methods mentioned.
Next you will want to determine the storage class for your bucket, if you want to leverage different storage classes you can create additional buckets. You will want to have one standard use bucket where you will generally pull your data from.
Uploading/Transferring Data & Resources to GCS
Upload your data to the cloud storage bucket you created for the long-term storage. This can be done with the web console or the cloud shell utility.
Create Your CloudyCluster Environment & GSC Storage CloudyCluster will create a GSC Storage volume for you as a part of the setup process. That storage stays active, even if the CloudyCluster environment is paused, and the Control Node VM is stopped. If you have not already created your cluster, you may do that while files are uploading to your storage bucket, or wait until they are completed. Steps for CloudyCluster are here.
Copying Resources Using Google Utility via Cloud Shell
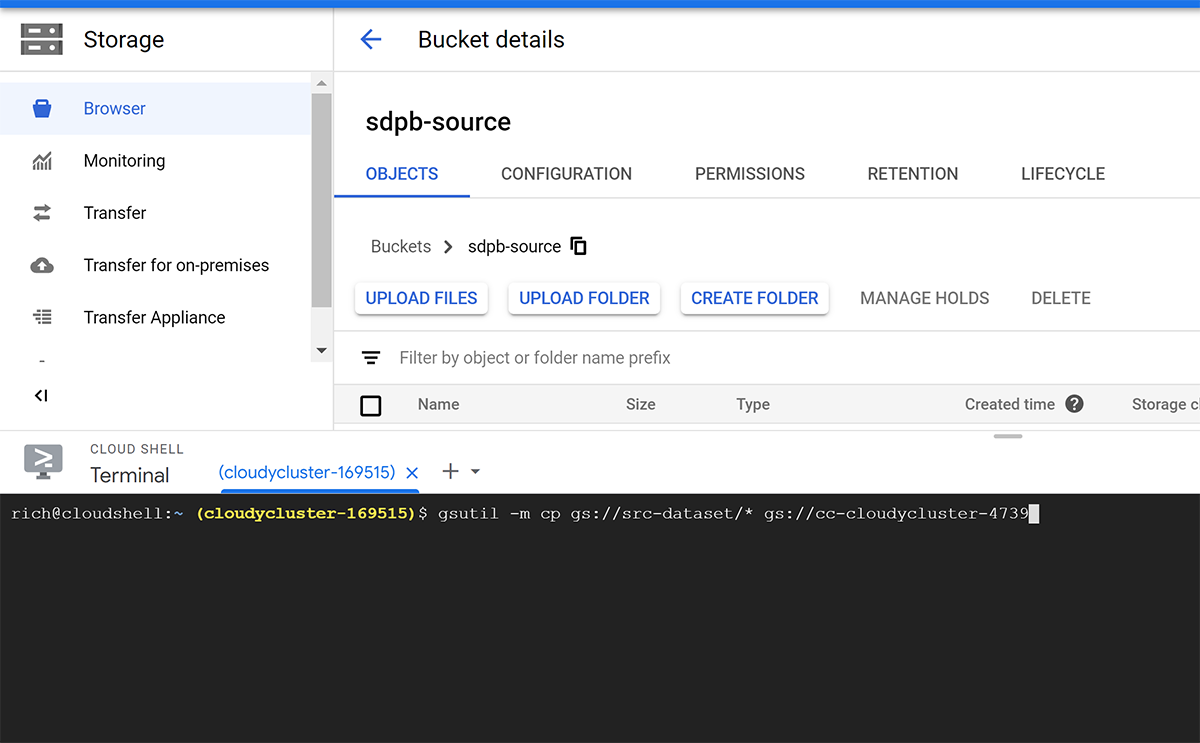
From within the GCS Dashboard, click the Activate Cloud Shell icon,

At the command prompt that opens with the Cloud Shell, use the following sample command to move your needed data to the CloudyCluster GCS bucket, or straight into your parallel nodes to prepare your job to run.
Moving Resources from Bucket to Bucket
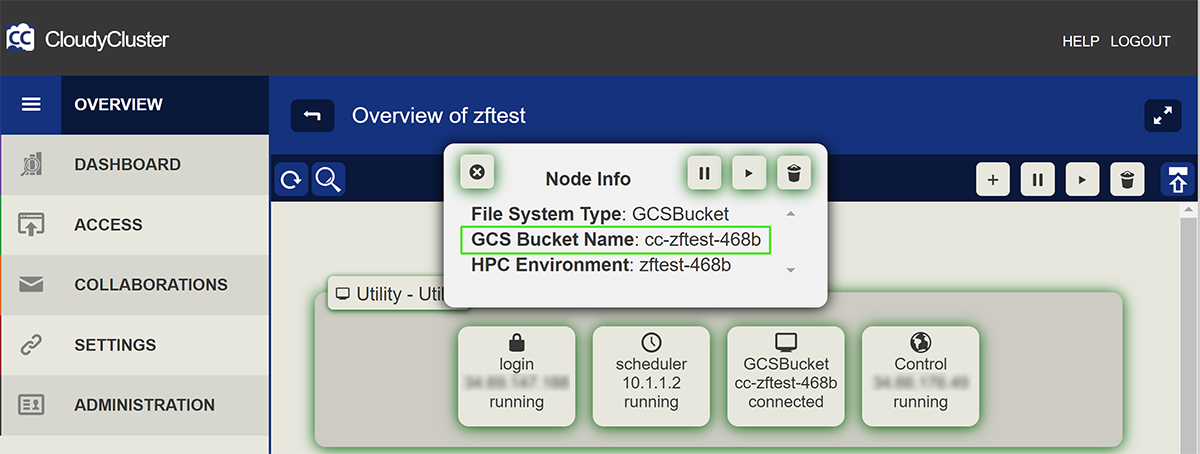
In your CloudyCluster environment, if you click on the node icon for the GCS bucket, you can see your included bucket name:
GCS to GCS Bucket Copy (sample)
gsutil -m cp gs://src-dataset/* gs://cc-cloudycluster-4739
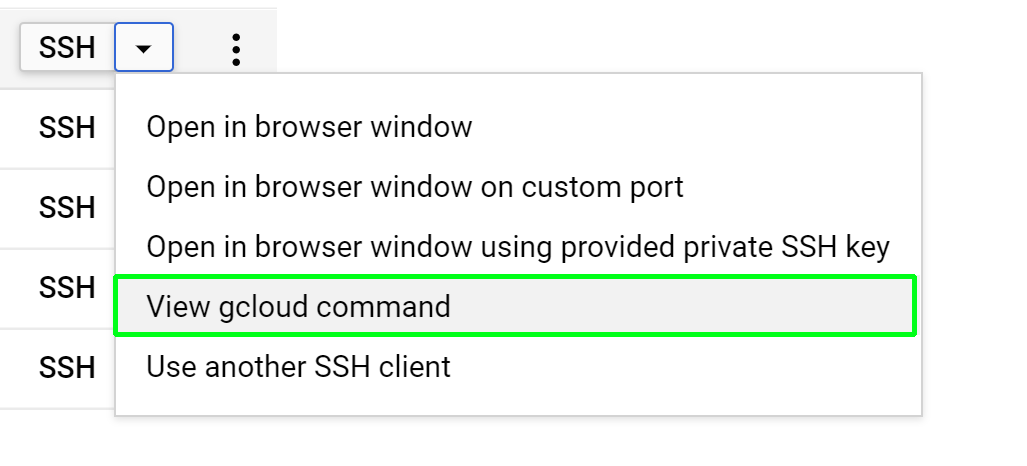
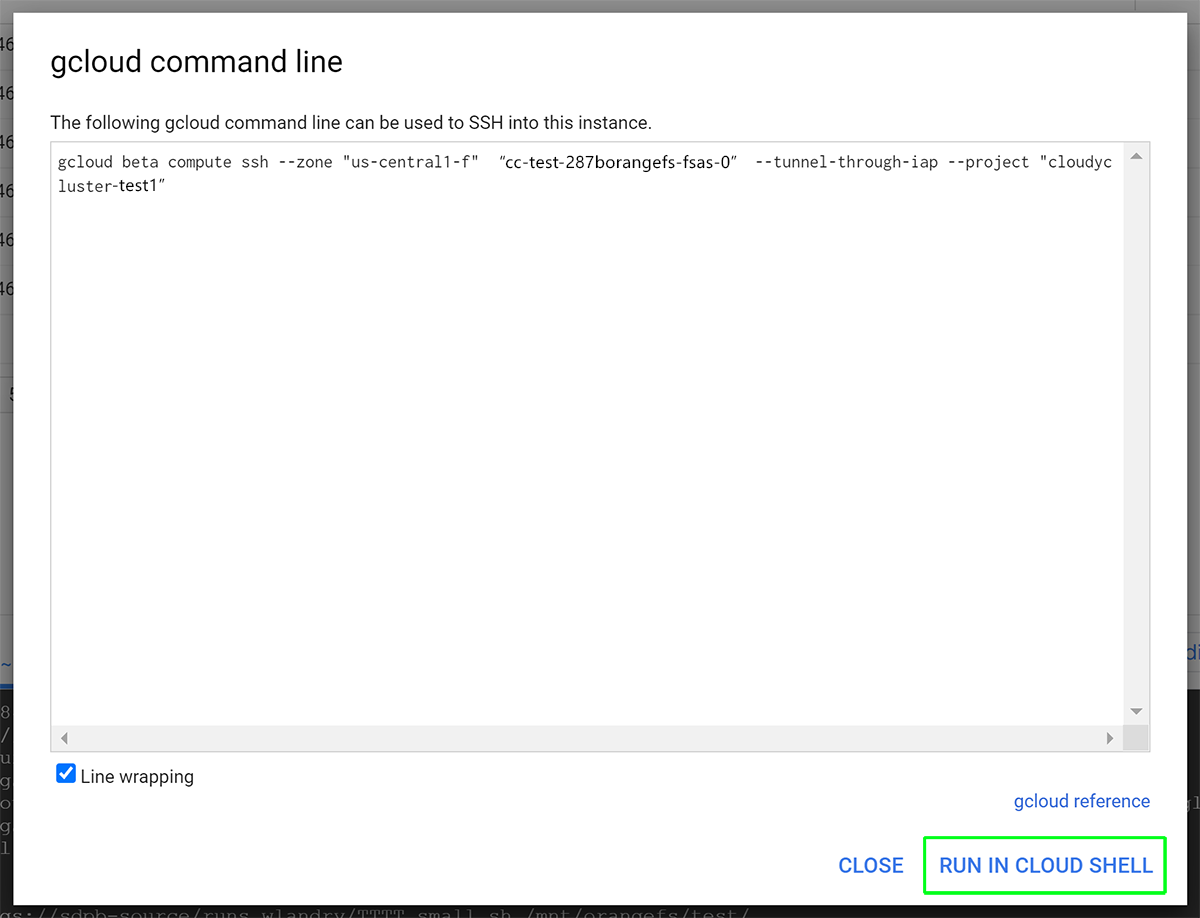
From the VM Console use the SSH drop-down menu to gcloud into your OrangeFS node (ex.cc-test-287borangefs-fsas-0)
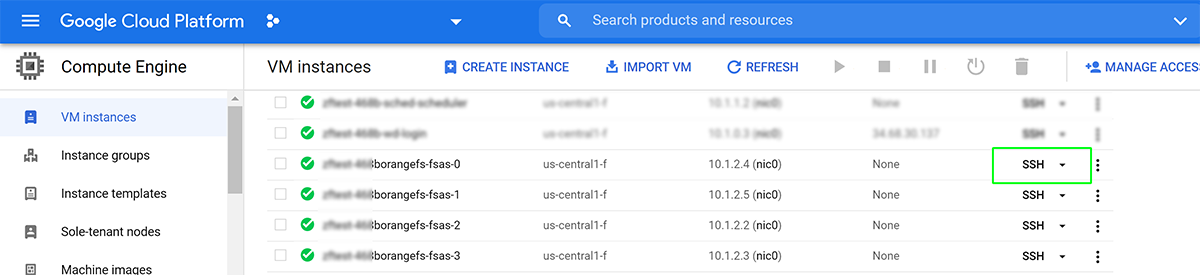
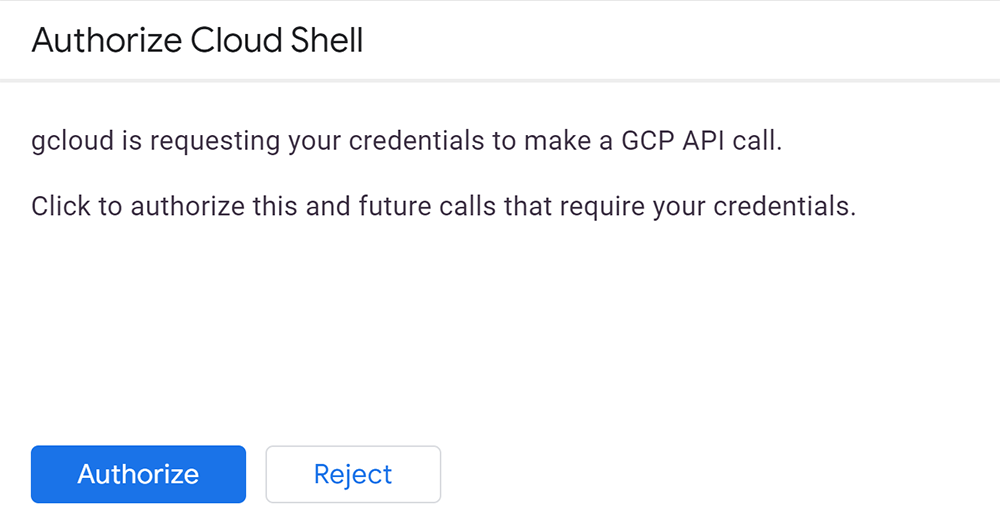
Run the command that dialog inserts at the command prompt. You will get an authorization request on the first run. Authorize the access.
Getting Resources from Your CloudyCluster GCS Bucket to the Compute Environment
GCS to Parallel FS Nodes in CloudyCluster (sample format)
Please note that the command prompt should reflect the home directory prompt of the OrangeFS node: [user@cc-test-287borangefs-fsas-0 ~]$ if the command prompt still shows as user@cloudshell:~ repeat the SSH menu steps above. Once at the correct command prompt, change directories to cd /mnt/orangefs this will get you into the correct path and ready to copy the files.
Run the command to copy data from the source repository to the working directory on the OrangeFS parallel file system:
[user@cc-test-287borangefs-fsas-0 orangefs]$ gsutil cp -r gs://[source-bucket]/[dir]/[file.tar] .
trailing “.” is telling Linux to copy to the present directory.
Conclusion
This process will allow users to store large data sets in a reliable and accessible location that will facilitate rapid movement of data to the CloudyCluster HPC & HTC environement bucket, parallel file systems, and compute nodes as needed to accomplish their jobs. Resulting data can similarly be migrated back to a storage bucket or directly downloaded locally for analysis.
Data sets can reside in the cloud making the next job faster to prepare, stage, and run. Google’s resilient and easy to use and scale storage with >99.9% availability, flexible accessibility and low pricing gives your research a solid integration with HPC work in the cloud with the integration of fast storage access with CloudyCluster.
